Rotiboy is a very popular snack food which originated in Malaysia and is also very popular in bakeries around Singapore, Indonesia, Thailand, Korea and other countries in Asia. It is also known as Mexican Coffee Buns, though they aren’t actually from Mexico. The method and sort of inspiration for the creation does however come from immigrants of Mexico who pass down the recipes for snack-bread like conchas or pan dulce and was modified by their children into this delicious, coffee flavored, crunchy bun. There are multiple important steps to this recipe, including making the bread for the buns, buttering-up the buns, as well as making the yummy coffee-flavored shell.
Recipe for the bun:
500 grams of flour (either bread flour, or regular)- I used bread flour
80 grams of sugar (cane or castor sugar works)- I use cane sugar
9 grams of salt
10 grams of yeast
60 grams of butter
280 milliliters of water
And one egg
For the bun filling, an extra 100 grams of butter
Instructions for the bun:
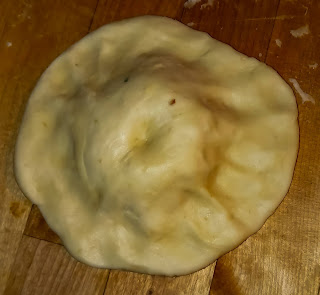
Put all of the dry ingredients into a bowl and combine them thoroughly. Add the water, egg, and butter and mix until clumpy and then you can put it on a clean, dry, lightly floured surface and knead it. It will be sticky, and the clumps probably won’t hold together at first. Knead it by pushing the ball away from you with the heel of your hand, ball it back up, turn it, and repeat. Trust me, eventually it will be completely formed, and you’ll be sore but it’s worth it! You will know the dough is ready once you can stretch it a bit and it doesn’t break apart and it stays in the shape you intend for it. Once you have your dough, put it in a clean bowl, cover with a towel or saran wrap, and let it rest for about an hour and a half to two hours. While you wait, measure out 100 grams of butter and divide them into blocks. These you’ll want to freeze (after dividing) so that when you wrap them in the dough, they will melt properly.
Once the first proof is done, lightly punch the ball and just get it a bit warm and flexible. Divide it into as many balls, of any size you would like. I did 10 balls; some were a bit smaller than others but that’s fine! Once you have your balls formed, get the extra butter from your fridge or freezer and flatten out your balls. Put the butter in the very center and wrap the bread around it. I did a pinch-rotate method to do this and then smoothed it out. Once you’ve done this with all of your buns, put them all on a pan and space them apart where there’s essentially a ghost bun in between each of them. Put a towel or cover the pan with saran wrap and proof the buns for another hour and a half. During this time, preheat the oven to 360 degrees Fahrenheit and prepare the coffee shell topping.
Recipe for the topping:
200 grams of butter (completely melted)
150 grams of sugar (either powdered, castor, or cane sugar works)- I used cane sugar
Three eggs
200 grams flour (again, bread flour or regular flour works)- I used the same I used for the bread
For the coffee flavor, you can either combine a tablespoon of instant coffee to two tablespoons of hot water or have three tablespoons of pre brewed coffee. You can also add two tablespoons of espresso, if you like a more coffee flavor. I used instant coffee and one tablespoon of espresso powder; the flavor was there but it wasn’t super strong.
I also added a teaspoon of nutmeg and cinnamon. Add as much or as little as you want for more of a holiday taste!
Instructions:
In a bowl, combine the butter and sugar and beat them until they are a pale color. Add the egg in and beat until just combined. It’ll be fluffy and airy, but not too dense. Tip- it will NOT look like whipped cream! You can hand beat them, or you can use an electric mixer. I used a handheld mixer and just kept the settings low. Once that is combined, add in the flour by folding it under with a spatula or mixing spoon. Don’t beat it as the flour will go flying! Add in the coffee flavor and mix until the texture is smooth and not too runny like cake batter, but not too stiff like dough.
Baking:
After your topping is prepared, and the buns have finished proofing, it’s time to combine everything in sweet, confectionary harmony. From the bowl containing the cream, you can either use a spoon to spread it onto the bun, or you can use a piping bag. Nothing too fancy needs to be done, the spread will melt onto the bun while cooking and create a crunchy top part. I used a spoon, putting a good-sized dollop on top and spreading it until about two thirds of the way down. You don’t want to do it too far because the point of the topping is to melt down. No biggie though if it gets on the pan! Put the pan in the oven and let the buns bake for 15-18 minutes, or until a nice golden-brown color. I recommend eating them when they are fresh out of the oven with either a good cup of hot cocoa or coffee. You can also wait to eat them of course, and if the crunch is gone, you can pop them back in the oven and cook them for up to 10 minutes to get the hard shell back.